
Open Destinations in eventabee before starting this guide.
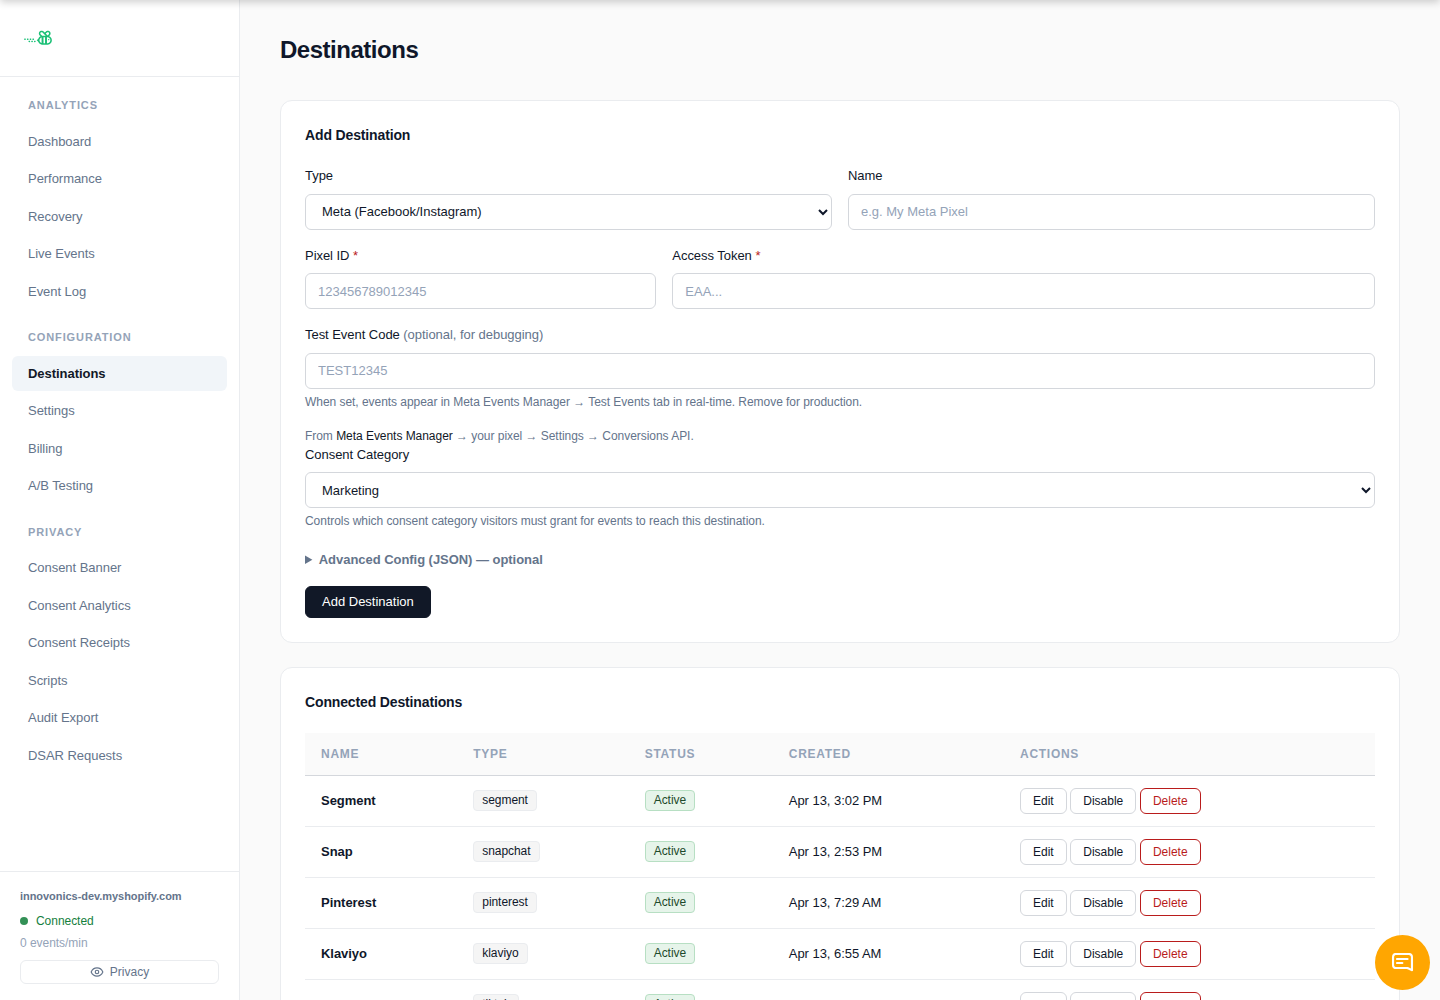
Click Add Destination, choose the destination type when it is available, give it a clear name, and save it. Then click Edit on the destination to fill in the structured fields and set the consent category.
If the type is not shown in the Add Destination menu, use Request a destination instead. eventabee currently exposes Meta, Google Analytics / Ads, TikTok, and Webhook directly in the add form; additional first-party connectors can be provisioned after review.
1. Create a system user and access token in Meta
In Meta Business Manager, create or use a system user with access to the dataset/pixel. Generate a token with Conversions API permissions.
2. Find your Dataset / Pixel ID
In Meta Events Manager, open the dataset or pixel connected to your ad account and copy the ID.
3. Paste into eventabee
In the Meta destination editor, fill in:
- Pixel ID — required.
- Access Token — required; stored as a secret and hidden after save.
- Test Event Code — optional; use while validating in Meta’s Test Events tool, then clear it for production.
- Consent Category — normally Marketing.
4. Save and verify
Trigger a page view or test checkout event, then check **Event Log** in eventabee and **Test Events** in Meta Events Manager.
Troubleshooting
- Invalid token errors usually mean the system user does not have access to the dataset.
- No events in Meta but deliveries in eventabee usually means the Meta test code is missing or you are looking at the wrong dataset.
- Consent-blocked deliveries mean the visitor did not grant the destination’s consent category.