
The consent banner controls which storefront events can be sent to analytics, marketing, and functional destinations. Open Consent Banner from the eventabee sidebar.
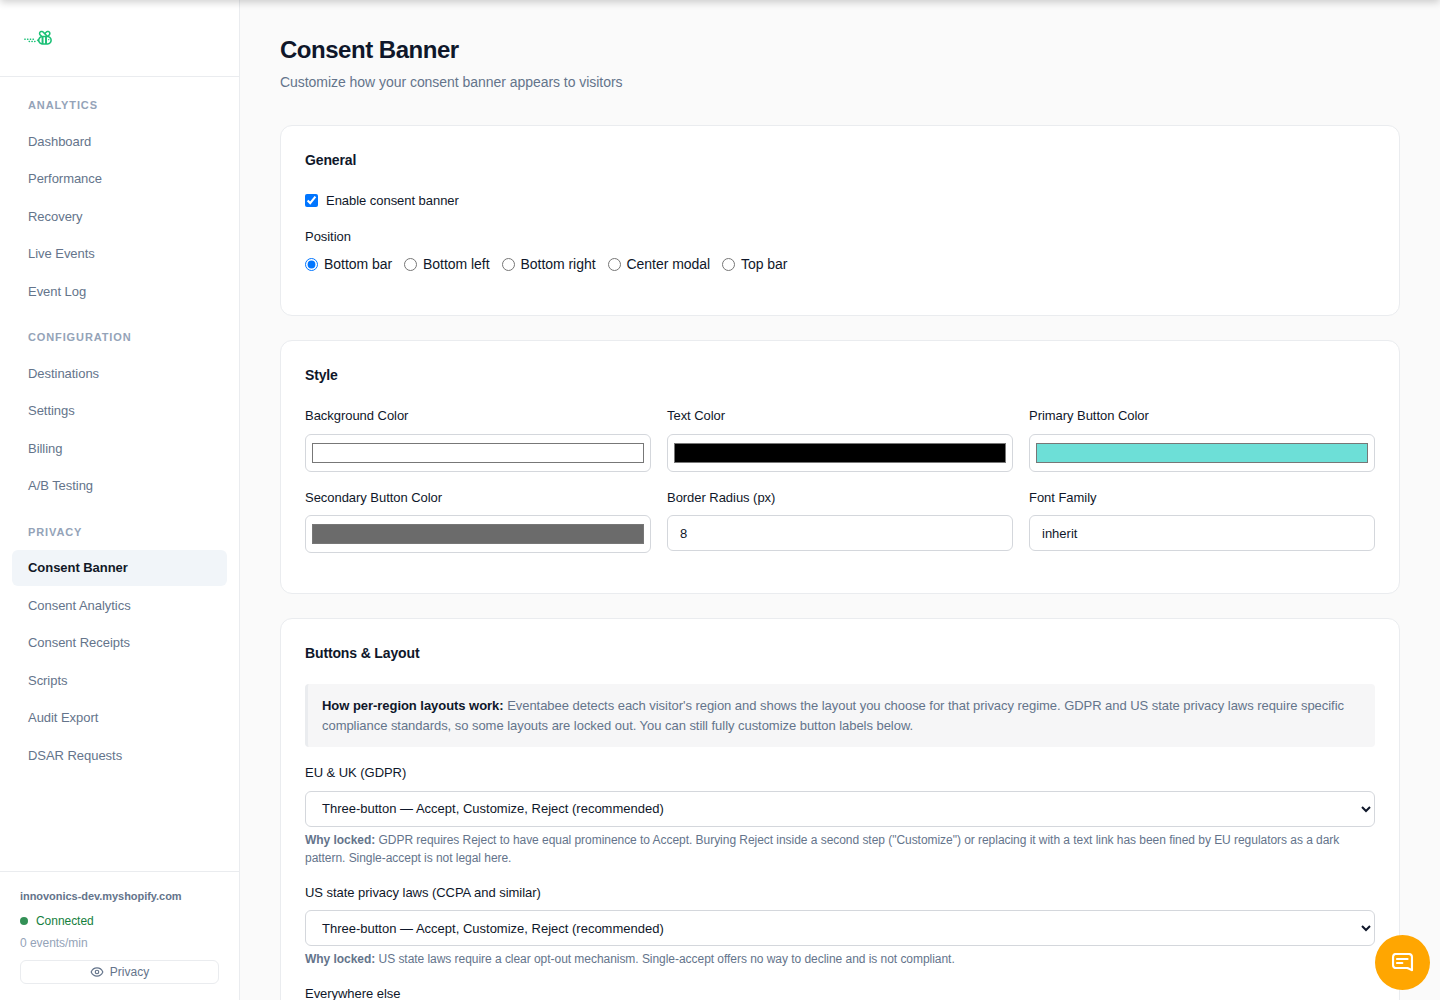
1. Enable the banner
In the General card, check Enable consent banner. Choose the banner position that best fits your theme:
- Bottom bar
- Bottom left
- Bottom right
- Center modal
- Top bar
2. Customize appearance
In Style, set the background color, text color, primary/secondary button colors, border radius, and font family. Use your storefront brand colors, but keep contrast high enough for accessibility.
3. Choose per-region layouts
In Buttons & Layout, choose a layout for each privacy regime:
- EU & UK (GDPR): three-button, reject-first, or two-button layouts. Single-accept and nested reject patterns are intentionally unavailable here.
- US state privacy laws: layouts must include a clear opt-out path.
- Everywhere else: all layouts are available, including implied-consent options.
You can customize the labels for Accept, Reject, Customize, Save preferences, and the manage-preferences link.
4. Edit banner copy and categories
In Content, update the headline, description, and category labels/descriptions:
- Functional
- Analytics
- Marketing
Also add your Privacy Policy URL and Cookie Policy URL so visitors can review your full policy.
5. Configure behavior
Use the Behavior, Dismissal Behavior, Preferences Re-entry, and Global Privacy Control (GPC) sections to control:
- Whether the banner appears on first visit.
- How many days before it reappears.
- Whether US/rest-of-world visitors can close the banner.
- Whether an X means Reject or temporary Dismiss where legally allowed.
- Whether a floating Cookie Settings button appears.
- How GPC signals are handled for US opt-out states.
6. Save and verify
Use the save bar to save your changes, then open the storefront in a fresh/incognito browser window. Accept, reject, and customize preferences to verify the banner behaves as expected.